


Prerequisite
Before processing your image data, ensure your calibration and stacking steps have been correctly completed. For stacking, we recommend using PixInsight’s WeightedBatchPreprocessing script or other reliable stacking utilities. The data used here consists of calibrated, registered, and integrated light frames from a deep-sky target.
General Guidelines
- Work with 32-bit floating point images in a linear state before any stretching or color adjustments.
- Save project snapshots frequently — PixInsight’s project files preserve all processes and image states for later reference.
- Use masks to protect image structures when performing aggressive noise reduction or stretching.
Image Processing Steps
Experience is an Valuable Teacher
PixInsight’s learning curve can be steep, but the reward is unparalleled control over your astrophotography data. The best approach is iterative — experiment, evaluate results, and refine your workflow as you gain experience.
Blink Your Image Data and Throw Out the Bad Subs

Use the Blink tool to preview all your subframes. Reject images with poor tracking, excessive noise, or gradients. Only the best frames should move forward to calibration and integration.
Use SubframeSelector to Accept Only the Best Data

The SubframeSelector process allows quantitative evaluation of your subframes using parameters like FWHM, eccentricity, and SNR weight. Select frames with the best combination of sharpness and low noise for stacking.
Stacking Our Clean Data

Use WeightedBatchPreprocessing or manual integration tools to combine your best subframes. The resulting master light should be clean, aligned, and still in a linear state — meaning it’s not yet visible as a bright image.
Non-Destructive Stretching

Apply the ScreenTransferFunction (STF) for a preview stretch — this is temporary and non-destructive. When satisfied, use HistogramTransformation to make that stretch permanent.
Now the Fun Starts
After stretching, begin enhancing details and managing noise. Processes like DynamicCrop, BackgroundNeutralization, ColorCalibration, and NoiseReduction help refine the image before final adjustments.

Use DynamicBackgroundExtraction (DBE) or AutomaticBackgroundExtractor (ABE) to remove gradients introduced by light pollution or flat fielding inconsistencies.

Apply ColorCalibration or PhotometricColorCalibration to achieve true star colors.
Stretching Our Image Data
We’ll now perform controlled stretching using the HistogramTransformation process. This step reveals the faint nebulosity and structures hidden in your linear data.
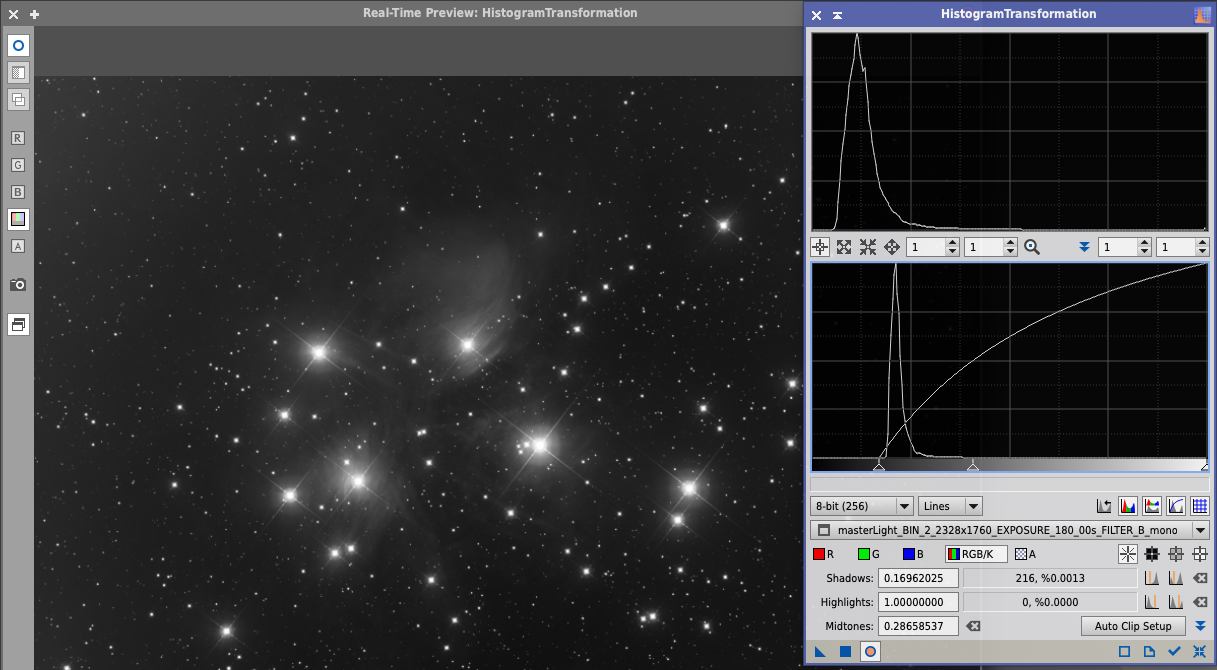
Let's Make This Simple — Stretch #1

Perform the first small stretch, moving the black point just to the edge of the histogram. Keep it minimal to preserve faint details.
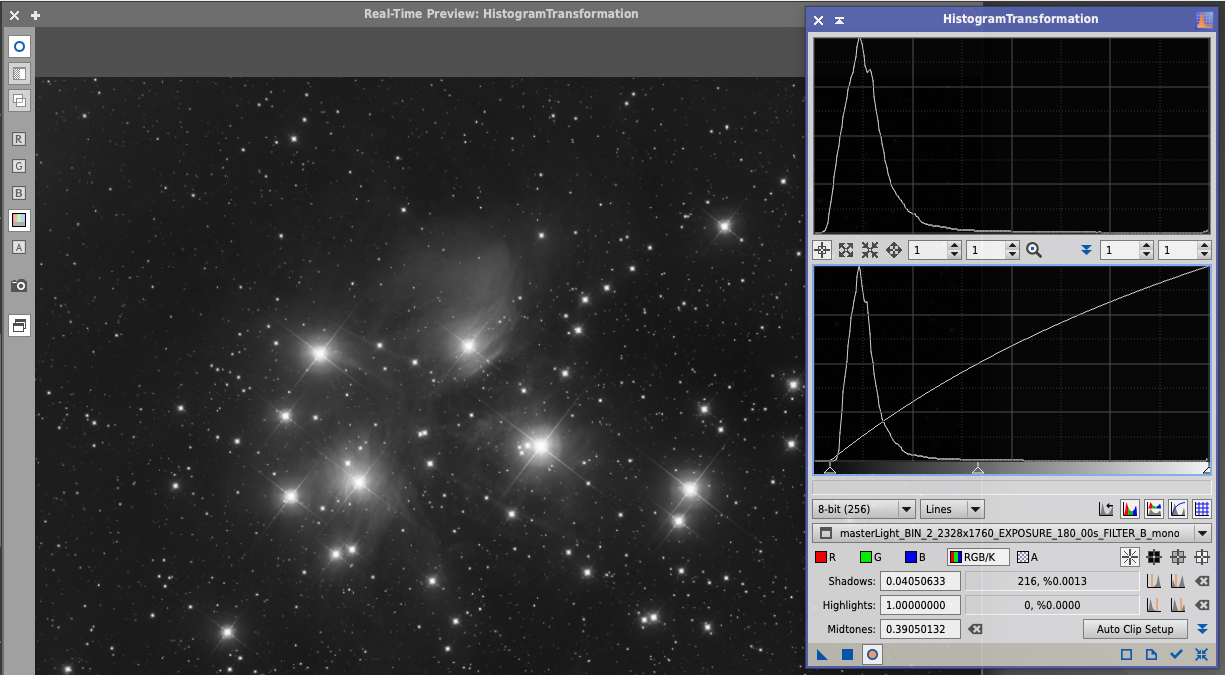
Stretch #2
Apply a second stretch to enhance midtone contrast. Continue to monitor for noise or over-saturation in bright stars.
Stretch #3
The final stretch should balance brightness and contrast — revealing the object’s structure without clipping shadows or highlights.
Final Touches

Apply gentle noise reduction using MultiscaleLinearTransform or NoiseXTerminator. Optionally, apply sharpening with Deconvolution or UnsharpMask.

Save your work as a 16-bit TIFF for external editing or printing.